

La verdadera localización va más allá de las palabras; requiere alineación visual con los estándares tipográficos localesfuente predeterminada de su sitio web. Una fuente que se ve elegante en inglés (escritura latina) puede renderizarse mal en hindi (devanagari) o árabe. MultiLipi le permite inyectar fuentes específicas Google Fonts para idiomas específicos, asegurando que sus páginas traducidas se sientan nativas y confiables.
Esta guía detalla el protocolo exacto para recuperando recursos de fuentes de Google y configurándolas en su centro de comandos MultiLipi.
1. Preparación de activos (Google Fonts)
Antes de configurar el panel, debes generar el punto final de fuente correcto de Google.
Selecciona Familia de Fuentes:
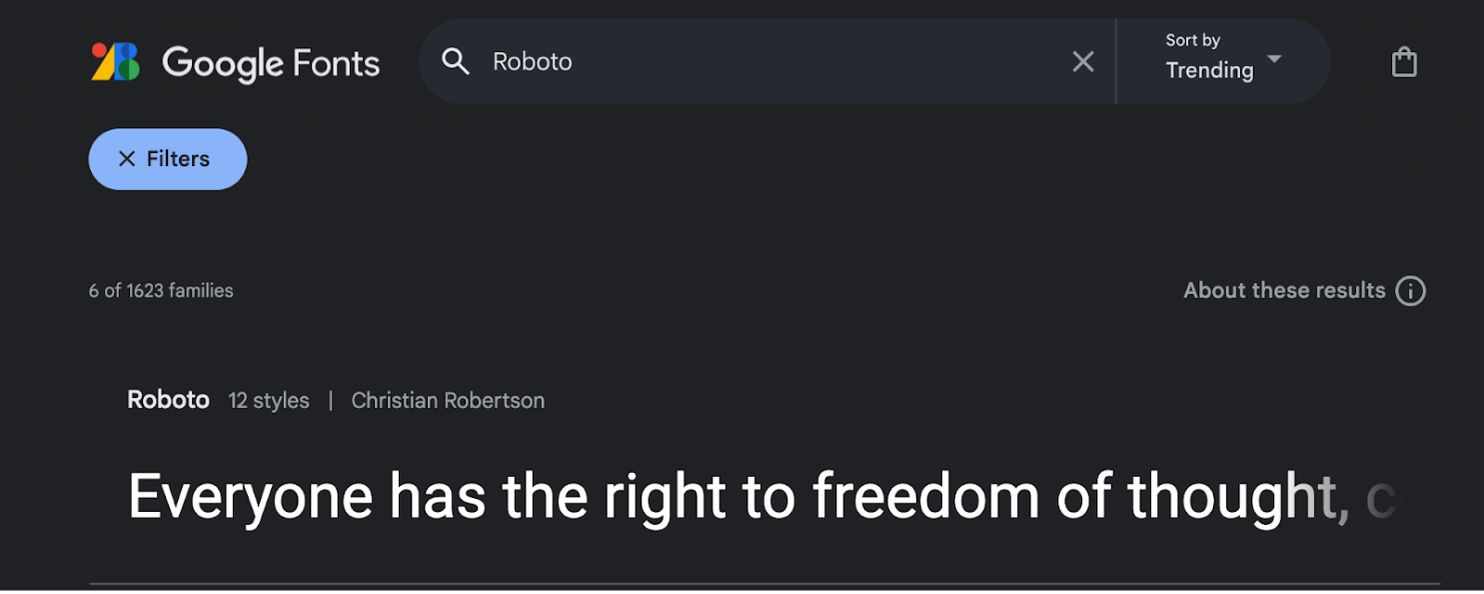
- •Navega a Google Fonts.
- •Busca la tipografía que desees (p. ej.,
"Roboto"o"Baloo 2"). - •Haga clic en la tarjeta de fuente para abrir sus detalles.
Selecciona Estilos:
- •Haz clic en "Obtener fuente" botón en la esquina superior derecha.
- •En la página de configuración, haz clic en "Obtener código de inserción".
Genera el enlace de importación:
- •En el panel izquierdo, selecciona los pesos/estilos específicos que necesitas (p. ej.,
Regular 400,Bold 700). - •Paso crucial: En el panel derecho, seleccione "Web" y asegúrese de hacer clic en
"@import"(en lugar de "enlace"). - •Copie la URL generada en el bloque de código.
2. Configuración de Infraestructura
Una vez que tengas el enlace de tu recurso, inyéctalo en el motor de traducción.
Navega a Configuración de Idiomas:
- •Inicia sesión en tu panel de administración de MultiLipi.
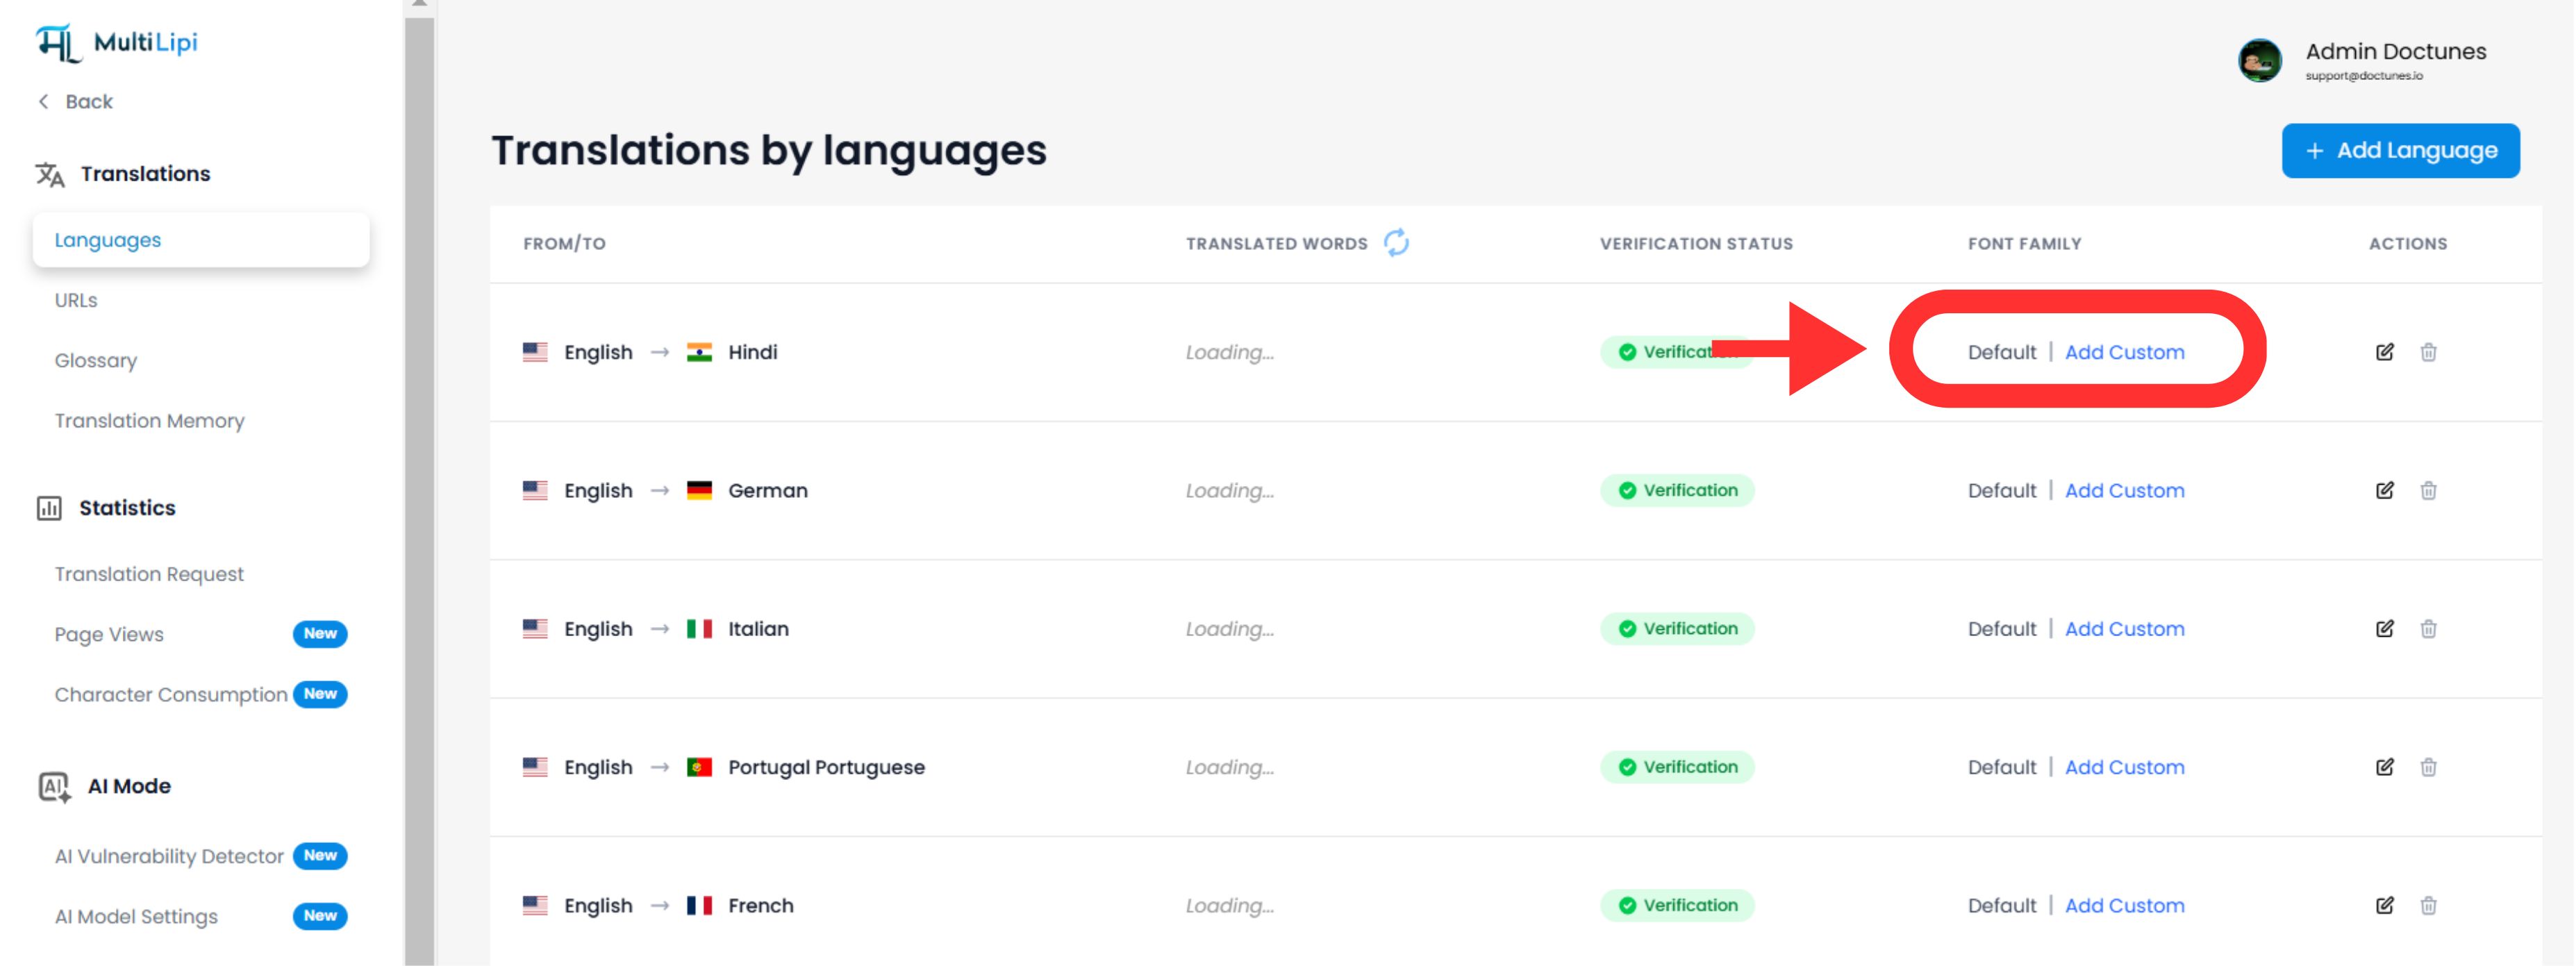
- •En la barra lateral izquierda, haga clic en Idiomas debajo de Traducciones sección.
Iniciar Inyección de Fuente:
- •Localice la fila de idioma específica que desea modificar (por ejemplo, Hindi).
- •Haz clic en
"Añadir fuente"botón junto a ese idioma.
Implementa el recurso:
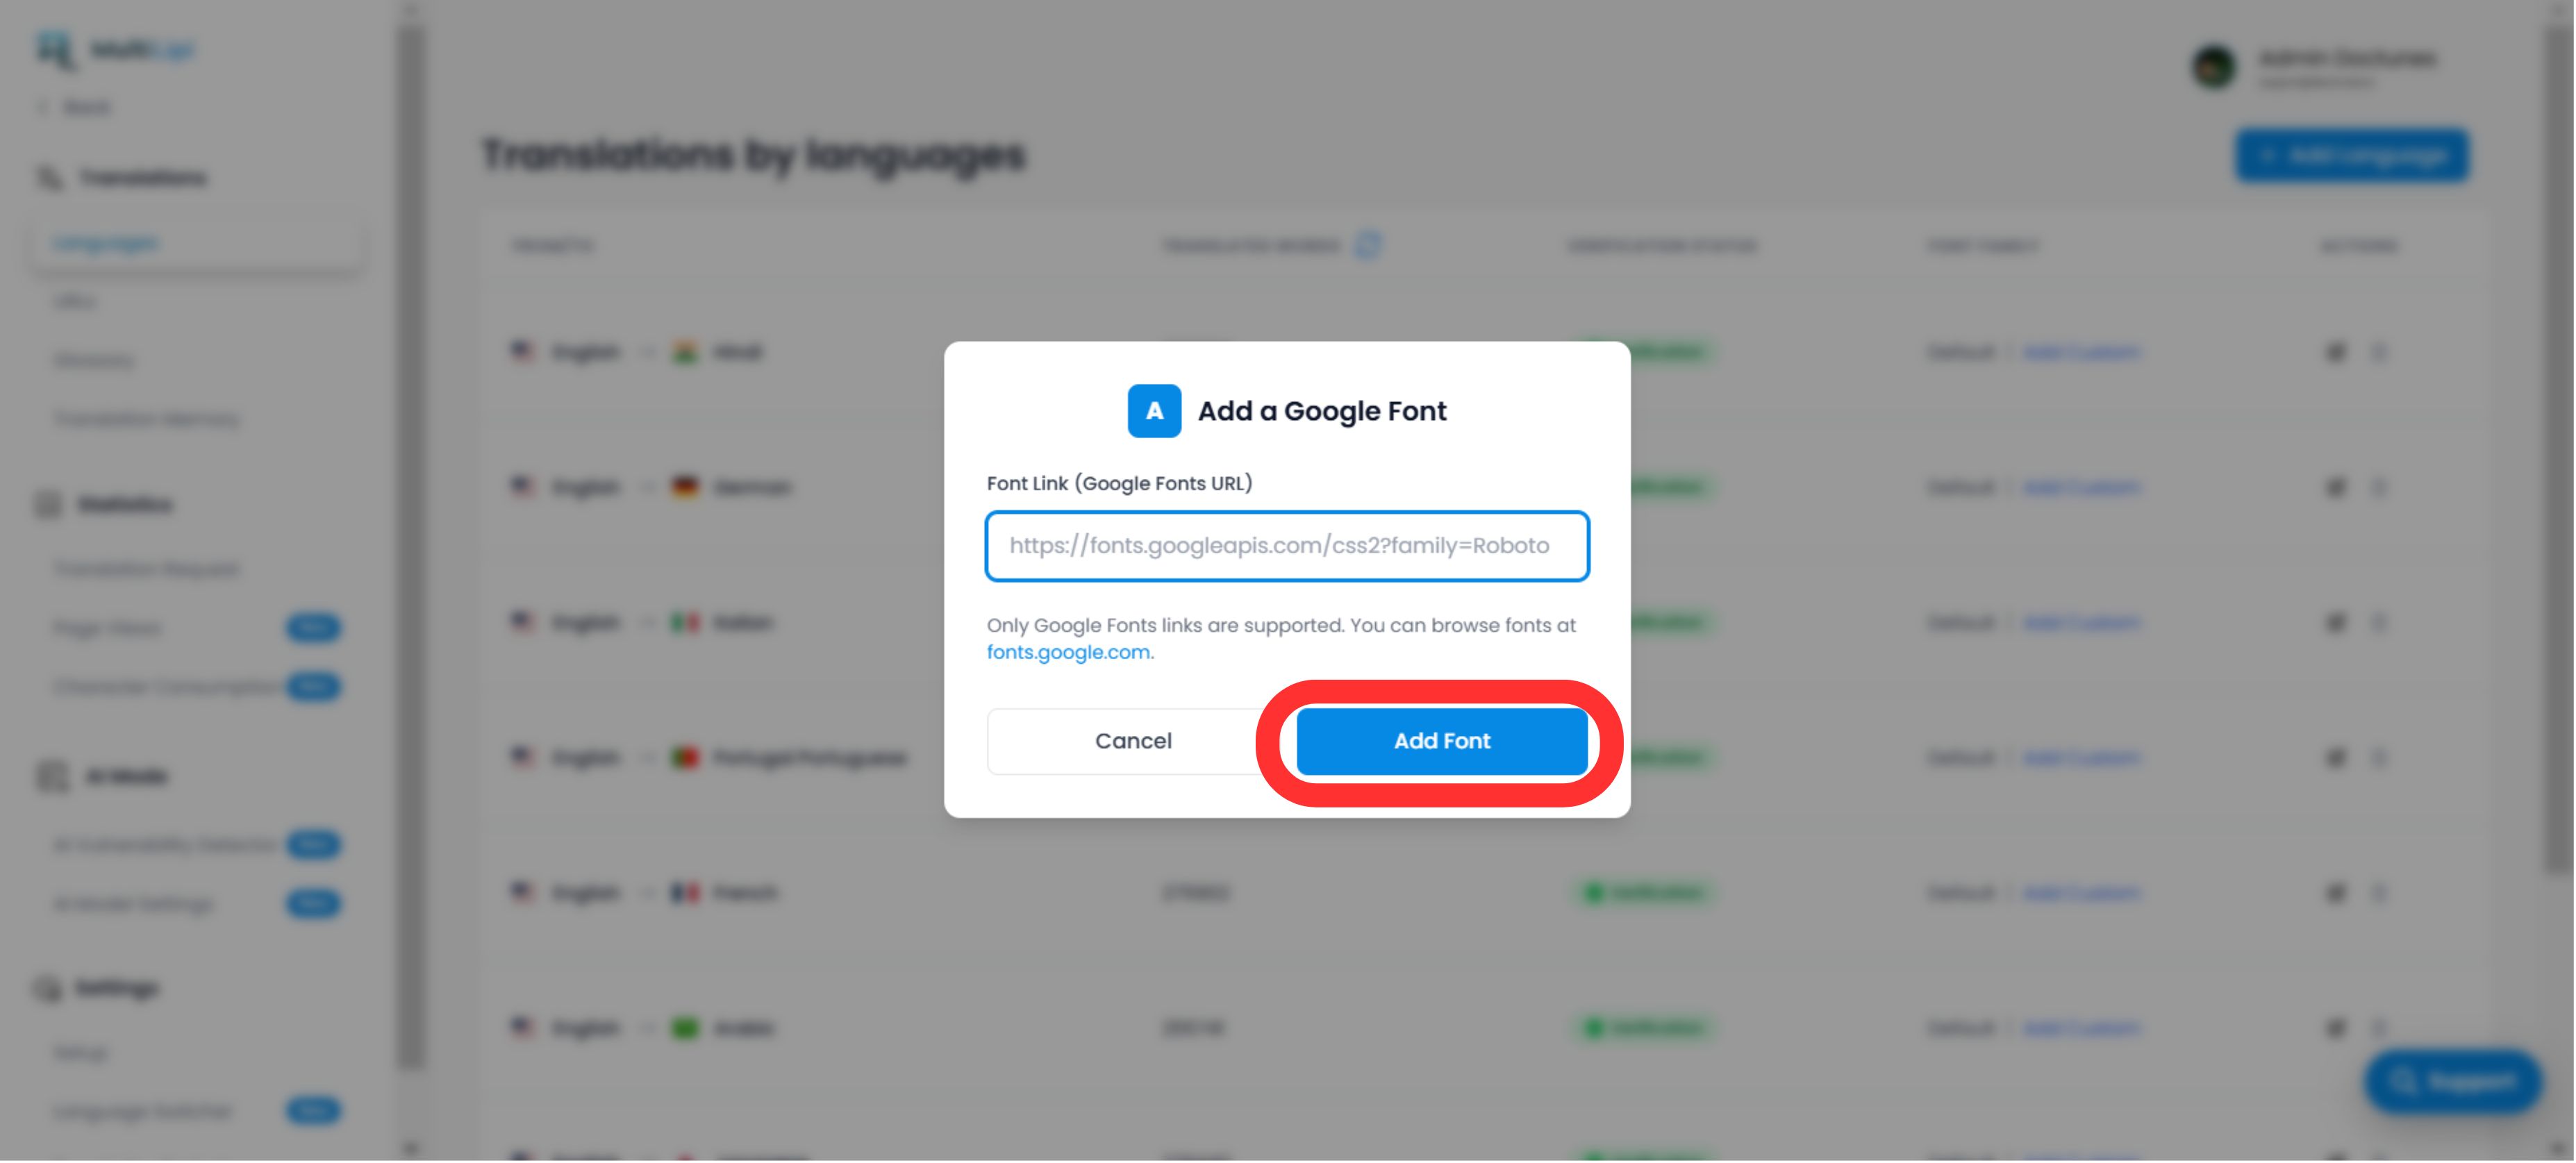
- •Aparecerá una ventana emergente.
- •Pega: Inserta la URL de Google Fonts que copiaste en el Paso 1.
- •Ejecutar: Haz clic
Enviar.
3. Validación y Renderizado
Despliegue inmediato:
Una vez enviado, la fuente se aplicado automáticamente a esa versión específica del idioma de su sitio. No se requieren cambios de CSS ni de código manual.
Fallback predeterminado:
Si no se agrega una fuente personalizada para un idioma, el sistema continuará renderizando la familia de fuentes predeterminada.
Nota técnica:
- •Asegúrese de que está pegando una URL válida de Google Fonts.
- •El sistema aplica esta fuente solo al idioma de destino, conservando tu diseño original para el idioma de origen.